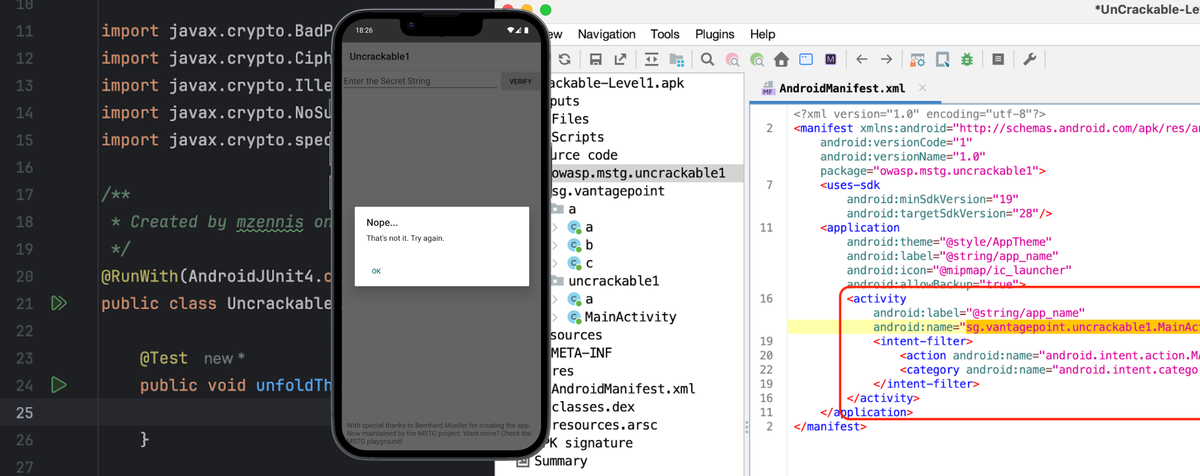
Co-Author: Lalu Raynaldi Pratama Putra
Have you ever wondered how easily a hacker could take control of your digital life? Perhaps you've seen a friend's social media account get compromised, or maybe you've even experienced a hack firsthand. This article aims to unlock the first door to understanding Mobile App Hacking for Android.
Are you ready to learn the secrets? 🕵️
The Foundation: OWASP MASVS and MASTG
First things first, the OWASP (Open Worldwide Application Security Project) develops standards and guidelines for application security. Their Application Security Verification Standard (ASVS) provides a framework for testing app security and offers developers secure coding practices.
- MASVS (Mobile Application Security Verification Standard) is the industry benchmark for secure mobile app development. Developers use it to build secure apps, and testers use it to identify vulnerabilities.
- MASTG (Mobile Application Security Testing Guide) is a comprehensive manual that outlines techniques for assessing security controls defined in MASVS, often by exploiting weaknesses listed in the OWASP Mobile Application Security Weakness Enumeration (MASWE).
Cracking the UnCrackable Apps
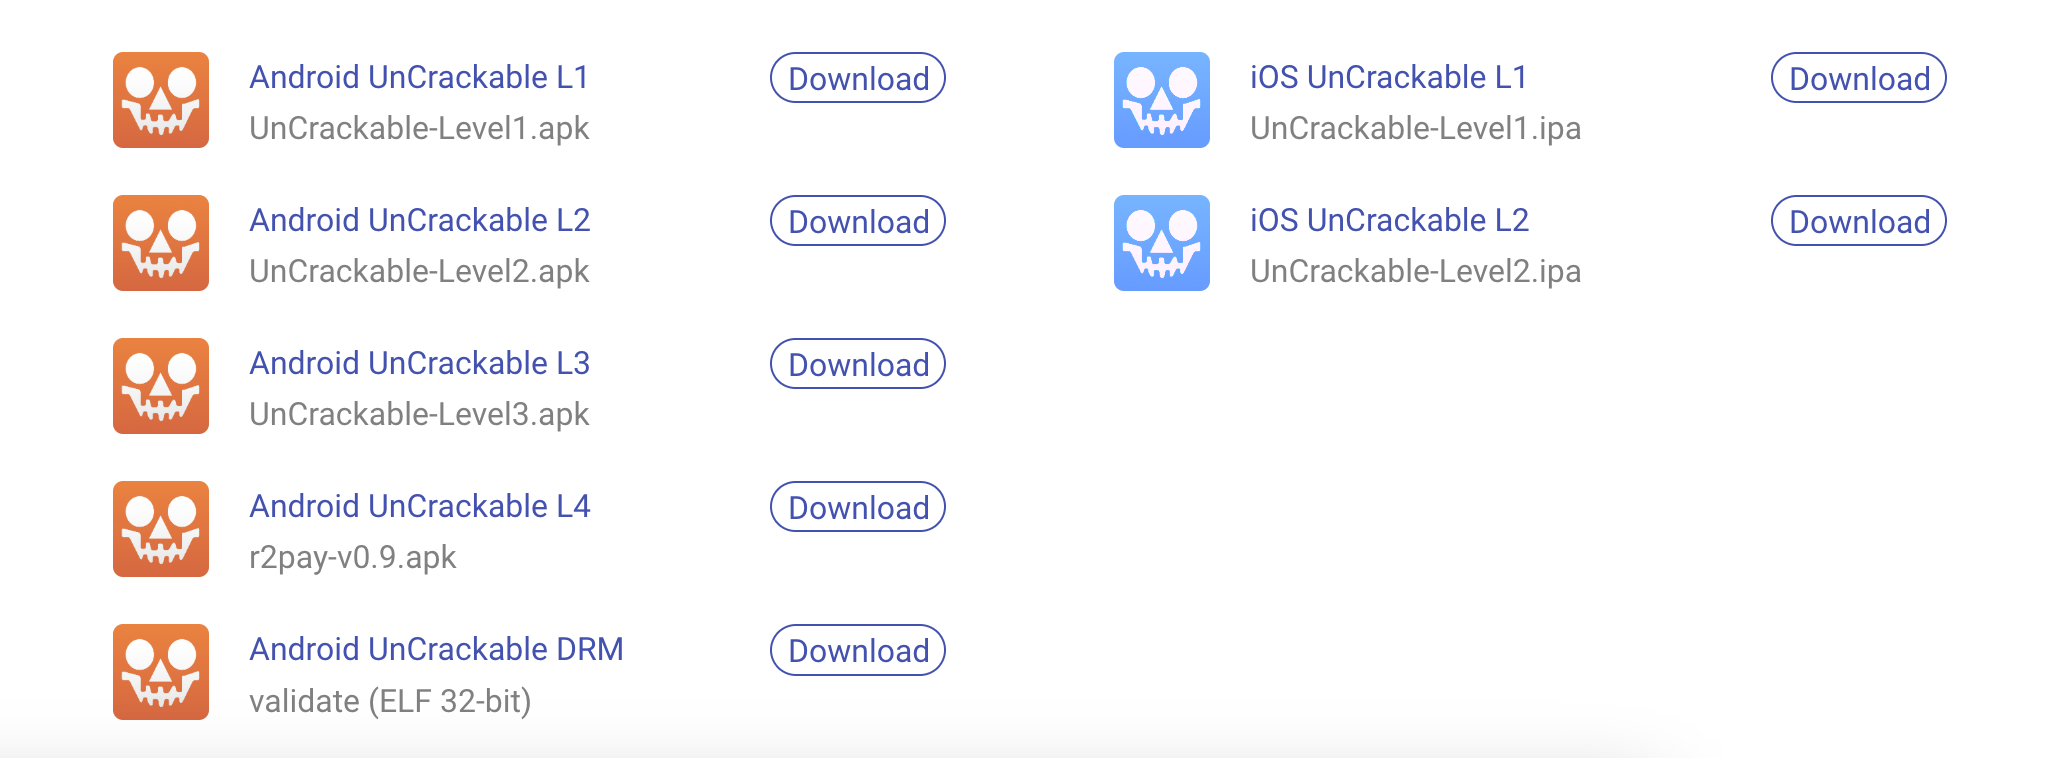
"MAS Crackmes", also known as UnCrackable Apps, is a collection of mobile reverse engineering challenges. In this article, we'll crack the Android UnCrackable L1.apk.
Prerequisites
Before we begin, ensure you have the following tools:
- Android Emulator - Download
- Android Debug Bridge (ADB) (optional) - Download
- JADX (GUI for static analysis) - Download
- Android Studio - Download
Step 1: Obtaining and Installing the APK
Download the APK here: UnCrackable-Level1.apk.
To install it:
- Drag-and-drop the APK into the emulator (simple way), or
- Use ADB for installation (because we're feeling fancy 😎):
$ adb install UnCrackable-Level1.apk
Next, we'll perform static analysis using JADX GUI to examine the code without executing the application.
Open the APK:
$ jadx-gui UnCrackable-Level1.apk
Step 2: Find the Entry point
Check AndroidManifest.xml to locate the <activity> class (entry point):
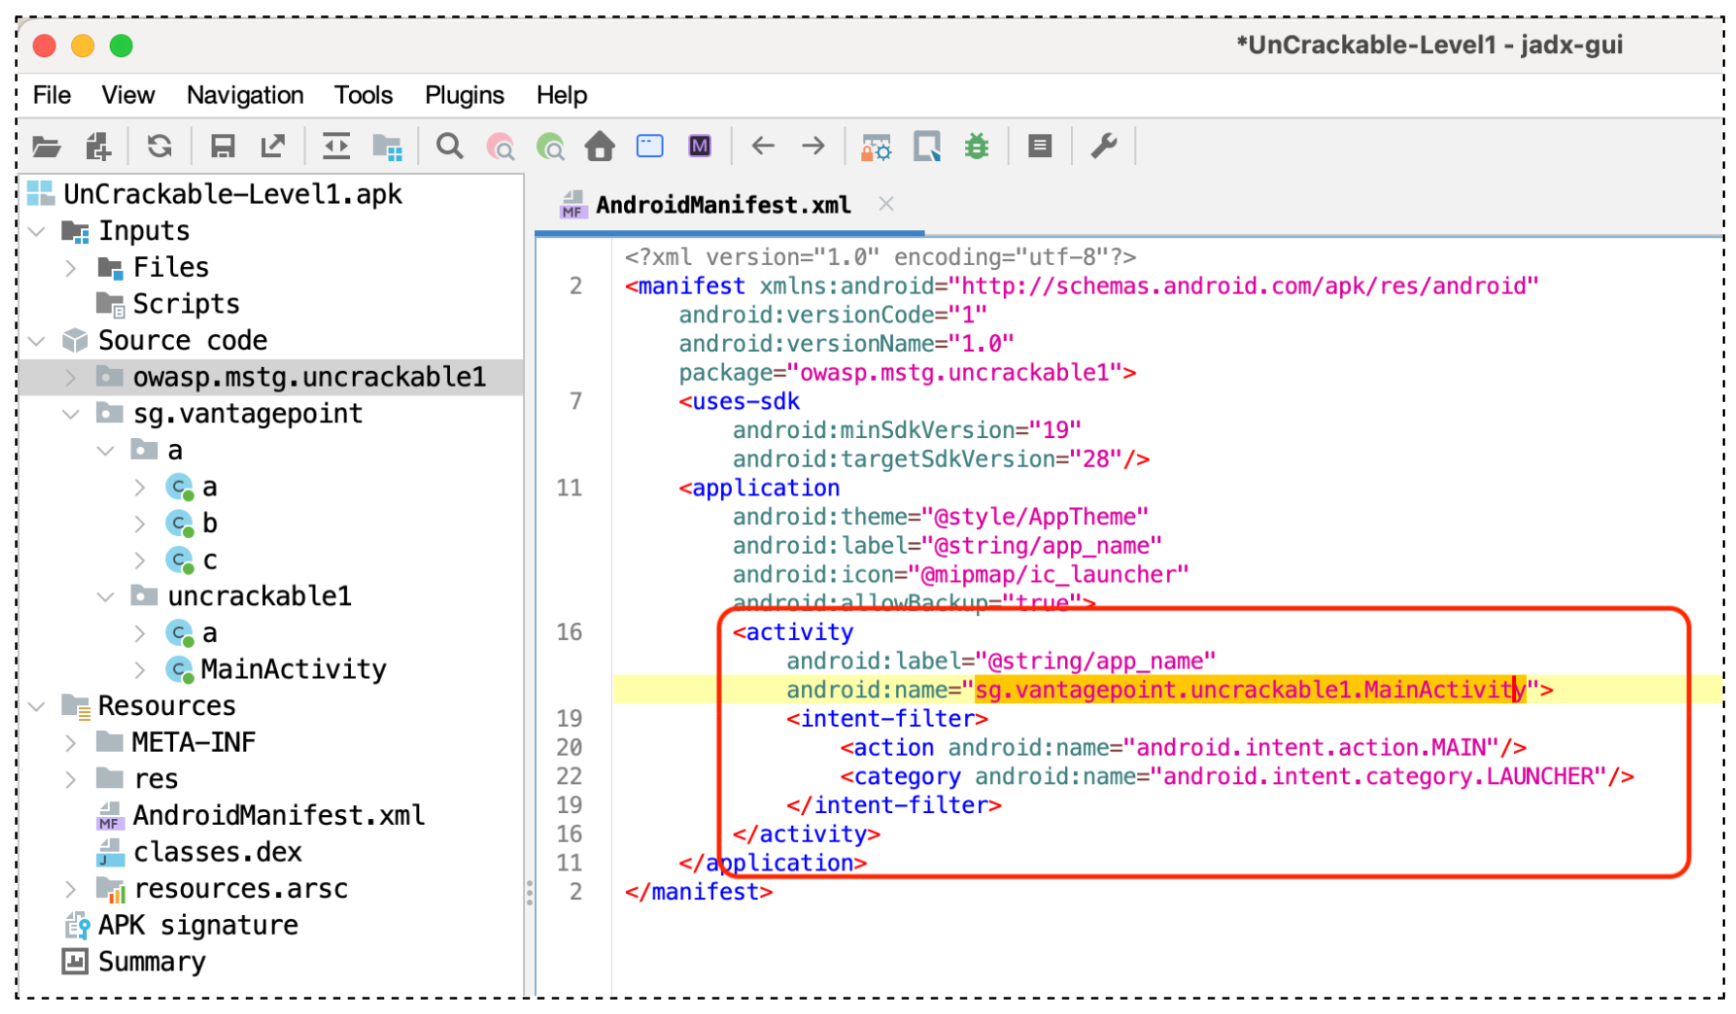
Look for android.intent.action.MAIN and android.intent.category.LAUNCHER.
android.intent.action.MAINit indicates, this<activity>class start as a main entry point.android.intent.category.LAUNCHERit indicates, this<activity>should appear in the home screen's launcher, or in anything else that considers itself to be a launcher.
The entry point is sg.vantagepoint.uncrackable1.MainActivity.
MainActivity class is automatically generated as the app's entry point.Step 3: Inspecting onCreate()
Inside the MainActivity class, the onCreate() method is the first to be executed.
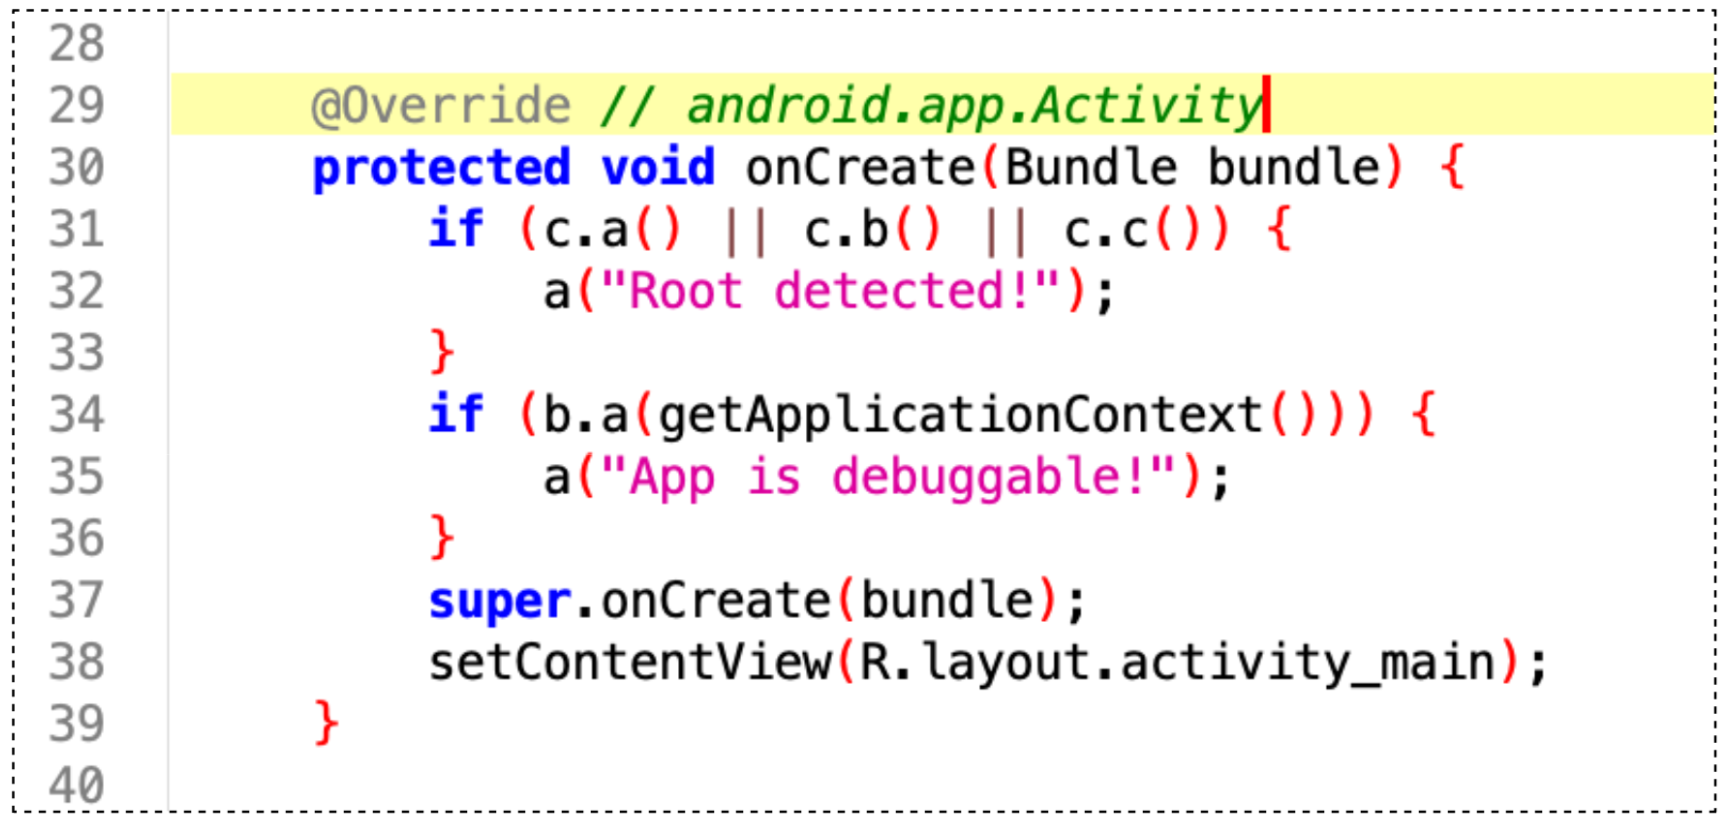
onCreate() method in MainActivity class.It does the following:
A. Checks if the device is rooted:
if (c.a() || c.b() || c.c()) {
    a("Root detected!");
}
- The
cclass verifies root status. - Obfuscation (e.g., class
c) makes reverse engineering harder, aligning with MASVS-RESILIENCE-3.
B. Checks if the app is debuggable:
if (b.a(getApplicationContext())) {
    a("App is debuggable!");
}
debuggable=false in production apps.C. Sets the UI layout:
setContentView(R.layout.activity_main);
This code tells us which layout is being used to show the UI to the user. Which is in this case is the activity_main file.
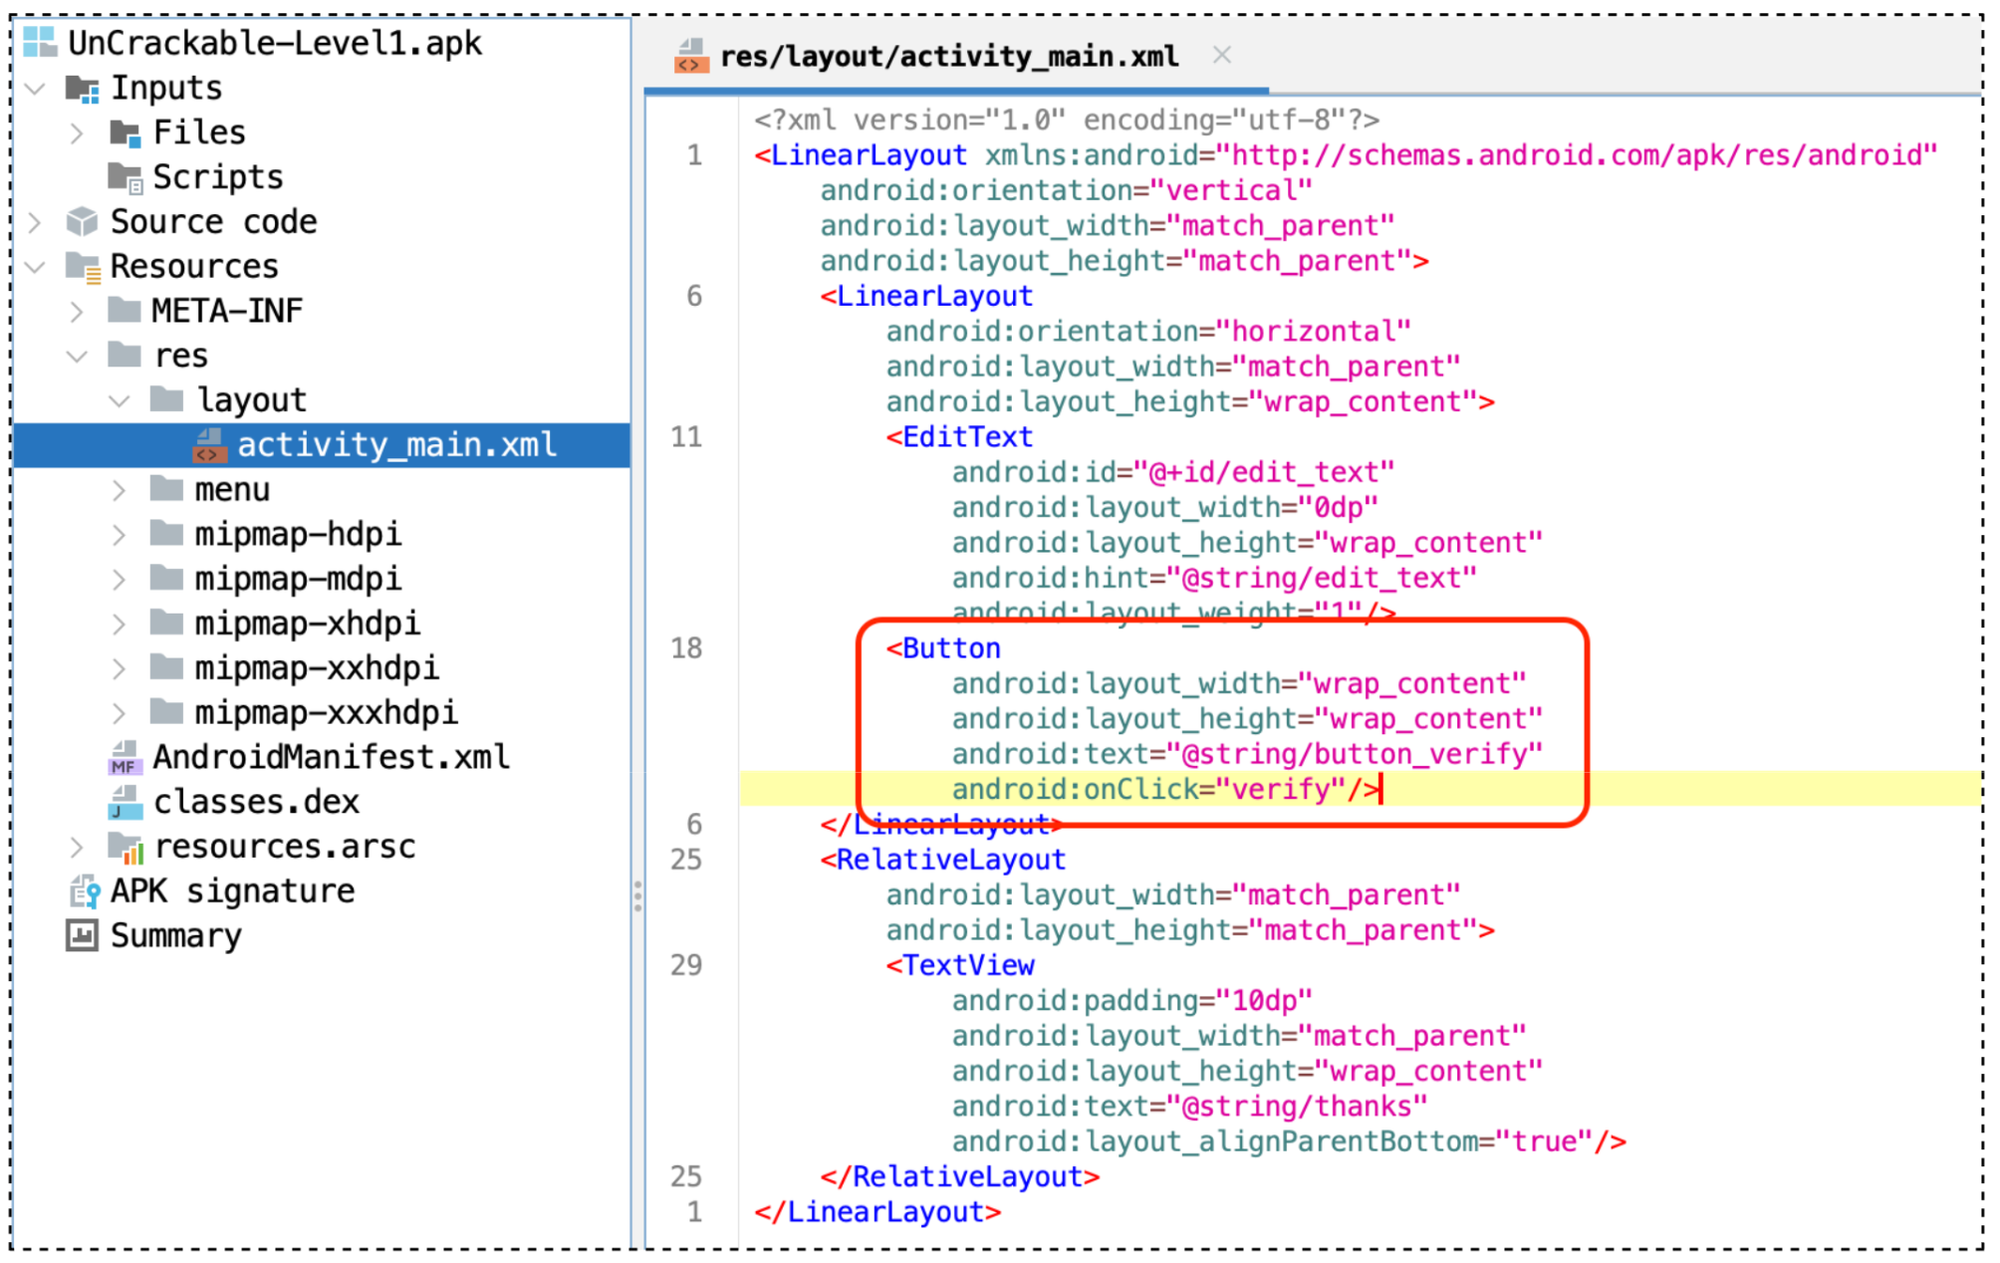
activity_main.xml, file that construct the UI of the MainActivity pageWe can easily spot the button to trigger the verification process, and this button will call the verify method as it stated in the android:onClick tag.
✔️ It benefits from obfuscation and dynamic UI rendering, making reverse-engineering harder.
✔️ Its compiled nature reduces the exposure of UI structure compared to plaintext XML files.
✔️ Sensitive logic and resources can be hidden more effectively in Kotlin code than in XML.
However, security ultimately depends on developer practices:
✔️ Avoid hardcoding sensitive data in both Compose and XML.
✔️ Use ProGuard or R8 for obfuscation.
✔️ Encrypt sensitive resources when needed.
✔️ Regularly update libraries to avoid vulnerabilities in dependencies.
So, where is the verify method? It should be in the MainActivity class where this activity_main.xml is being called.
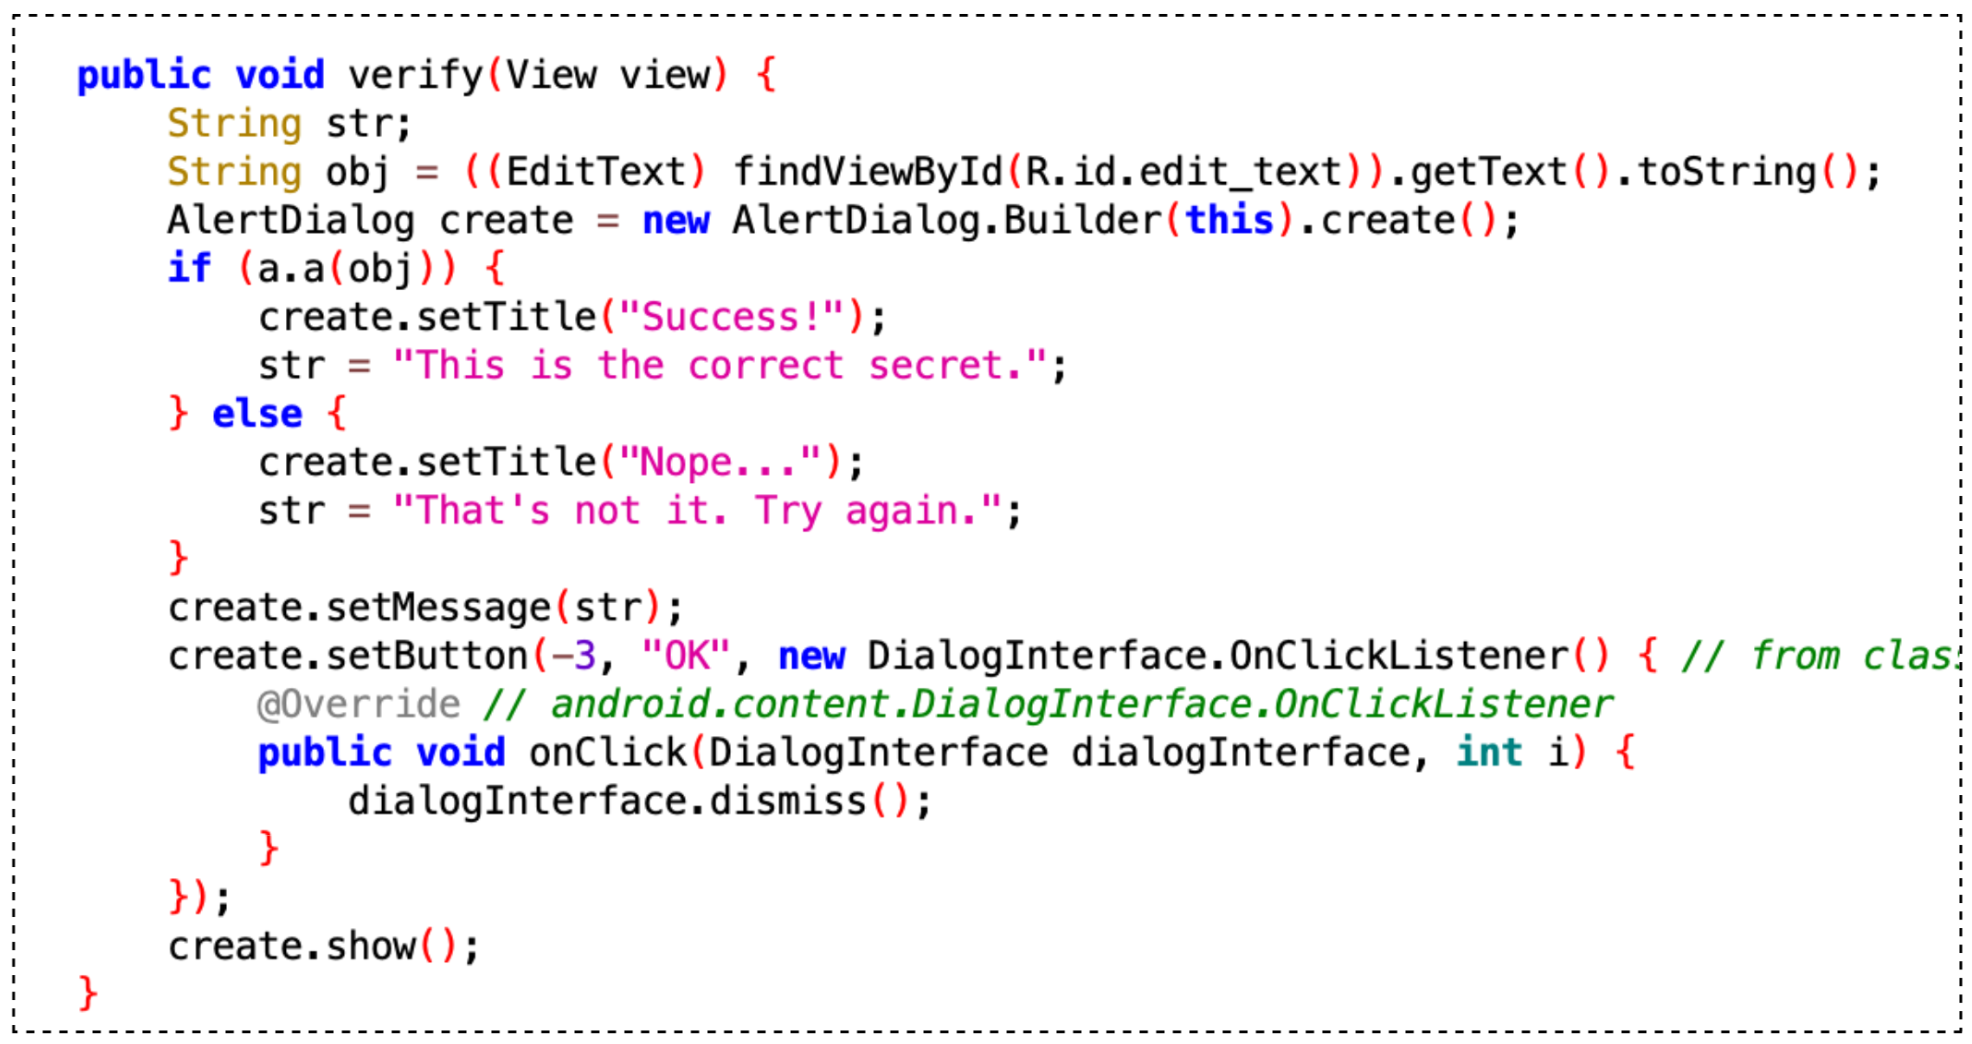
verify(view) method that is being called when button “Verify” is clickedStep 4: Uncovering the Secret in verify()
The button on the UI calls the verify(view) method:
if (a.a(obj)) {
    create.setTitle("Success!");
    str = "This is the correct secret.";
} else {
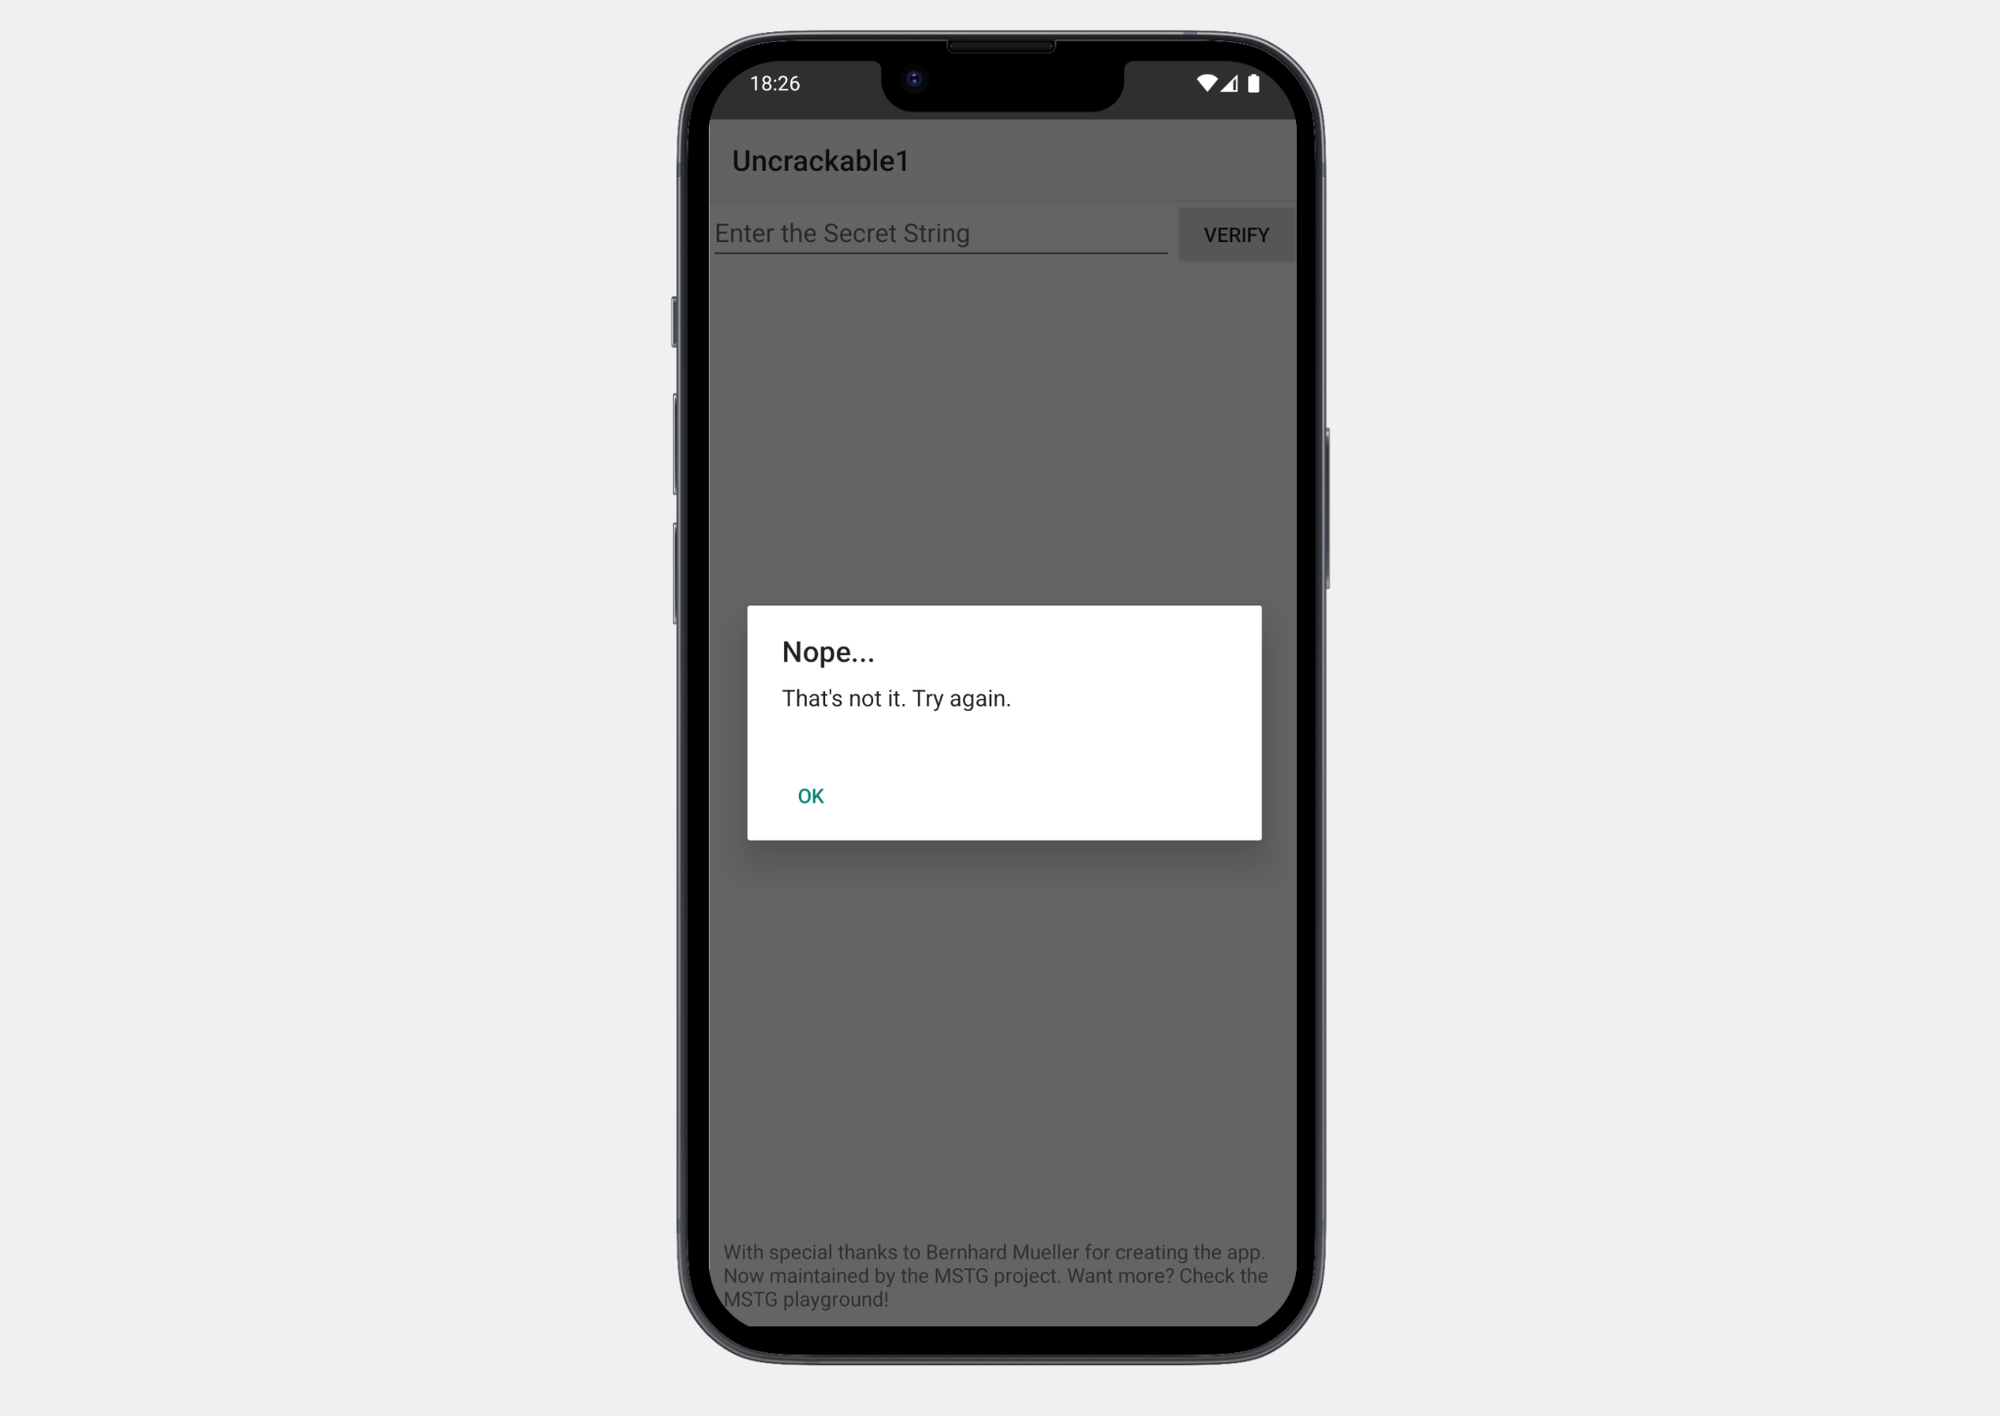
    create.setTitle("Nope...");
    str = "That's not it. Try again.";
}
It checks if obj matches the secret string hidden in the code.
To find the secret string, look into the a.a(obj) method and its dependencies.
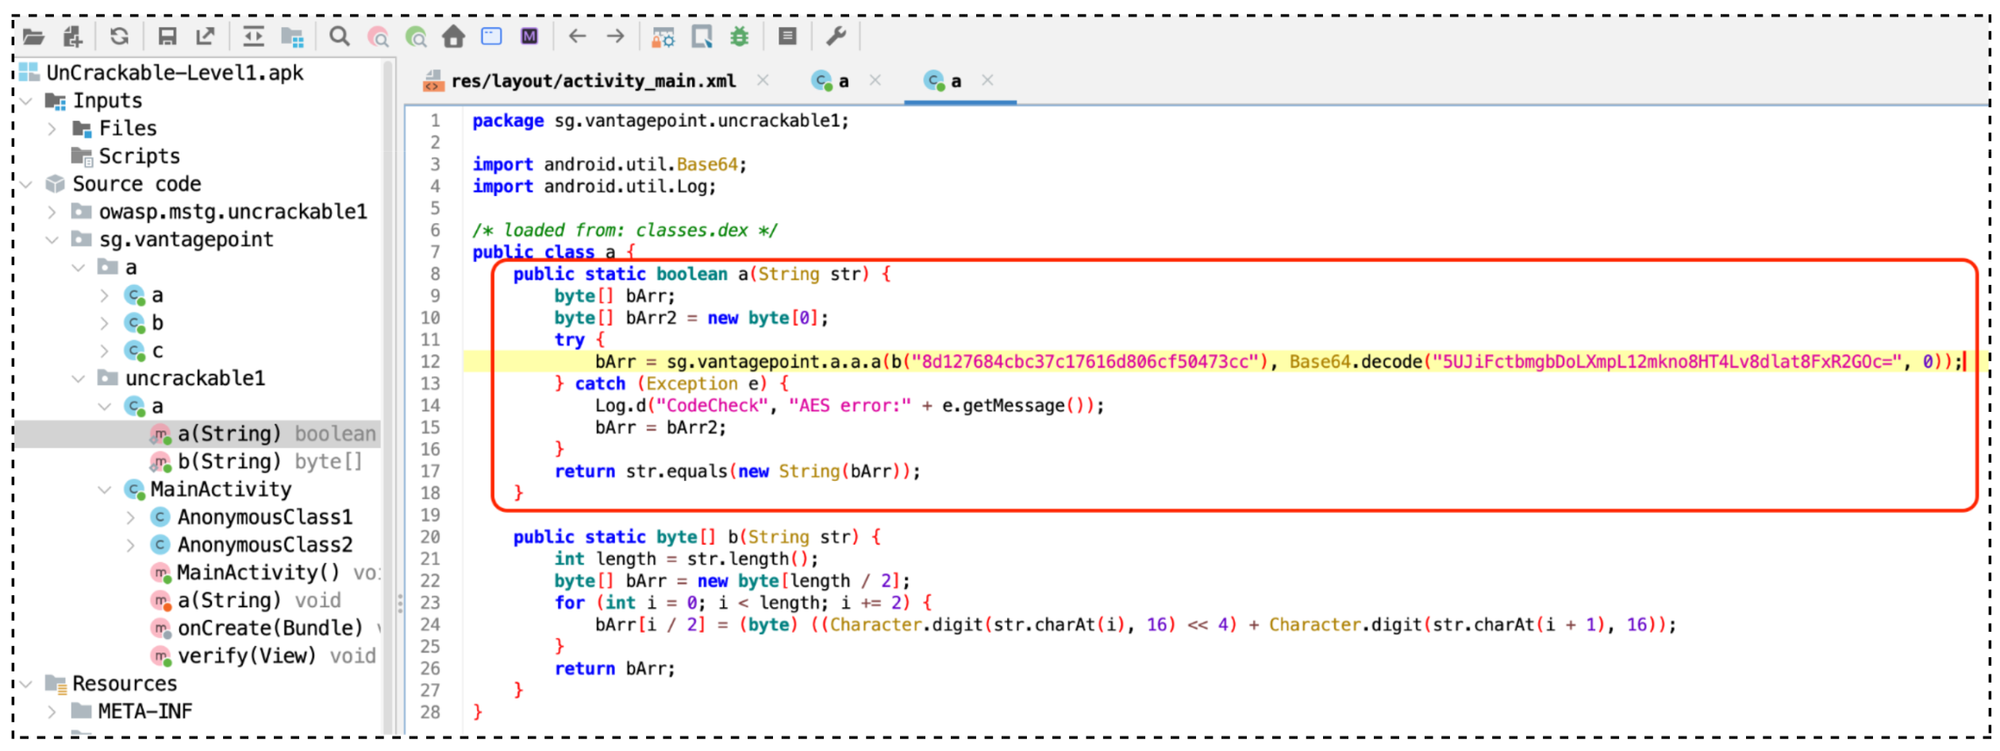
a class, where the secret is hidden.The decryption process involves:
bArr = sg.vantagepoint.a.a.a(
    b("8d127684cbc37c17616d806cf50473cc"),
    Base64.decode("5UJiFctbmgbDoLXmpL12mkno8HT4Lv8dlat8FxR2GOc=", 0)
);- AES Key (first argument): Hardcoded in hexadecimal (
8d127684...) - Base64-encoded Encrypted Data (second argument).
Now, let's take a look closely at the sg.vantagepoint.a.a.a(byte, byte) function.

sg.vantagepoint.a.a.a(byte, byte) function, doing the decryption method using the AES algorithm.This function:
- Takes an AES key (
bArror we called it “first argument”) and encrypted data (bArr2or “second argument”).- The first argument: A
byte[]representing the key used for decryption. - The second argument: A
byte[]representing the encrypted data (cipher text) to be decrypted.
- The first argument: A
- Configures an AES cipher in ECB mode with PKCS padding.
- Decrypts the encrypted data and returns the plaintext as a
byte[].
Step 5: Putting It All Together
Copy the decryption logic into a test class (e.g., UncrackableApp1Test) to reveal the secret:
Conclusion: The Secret Code
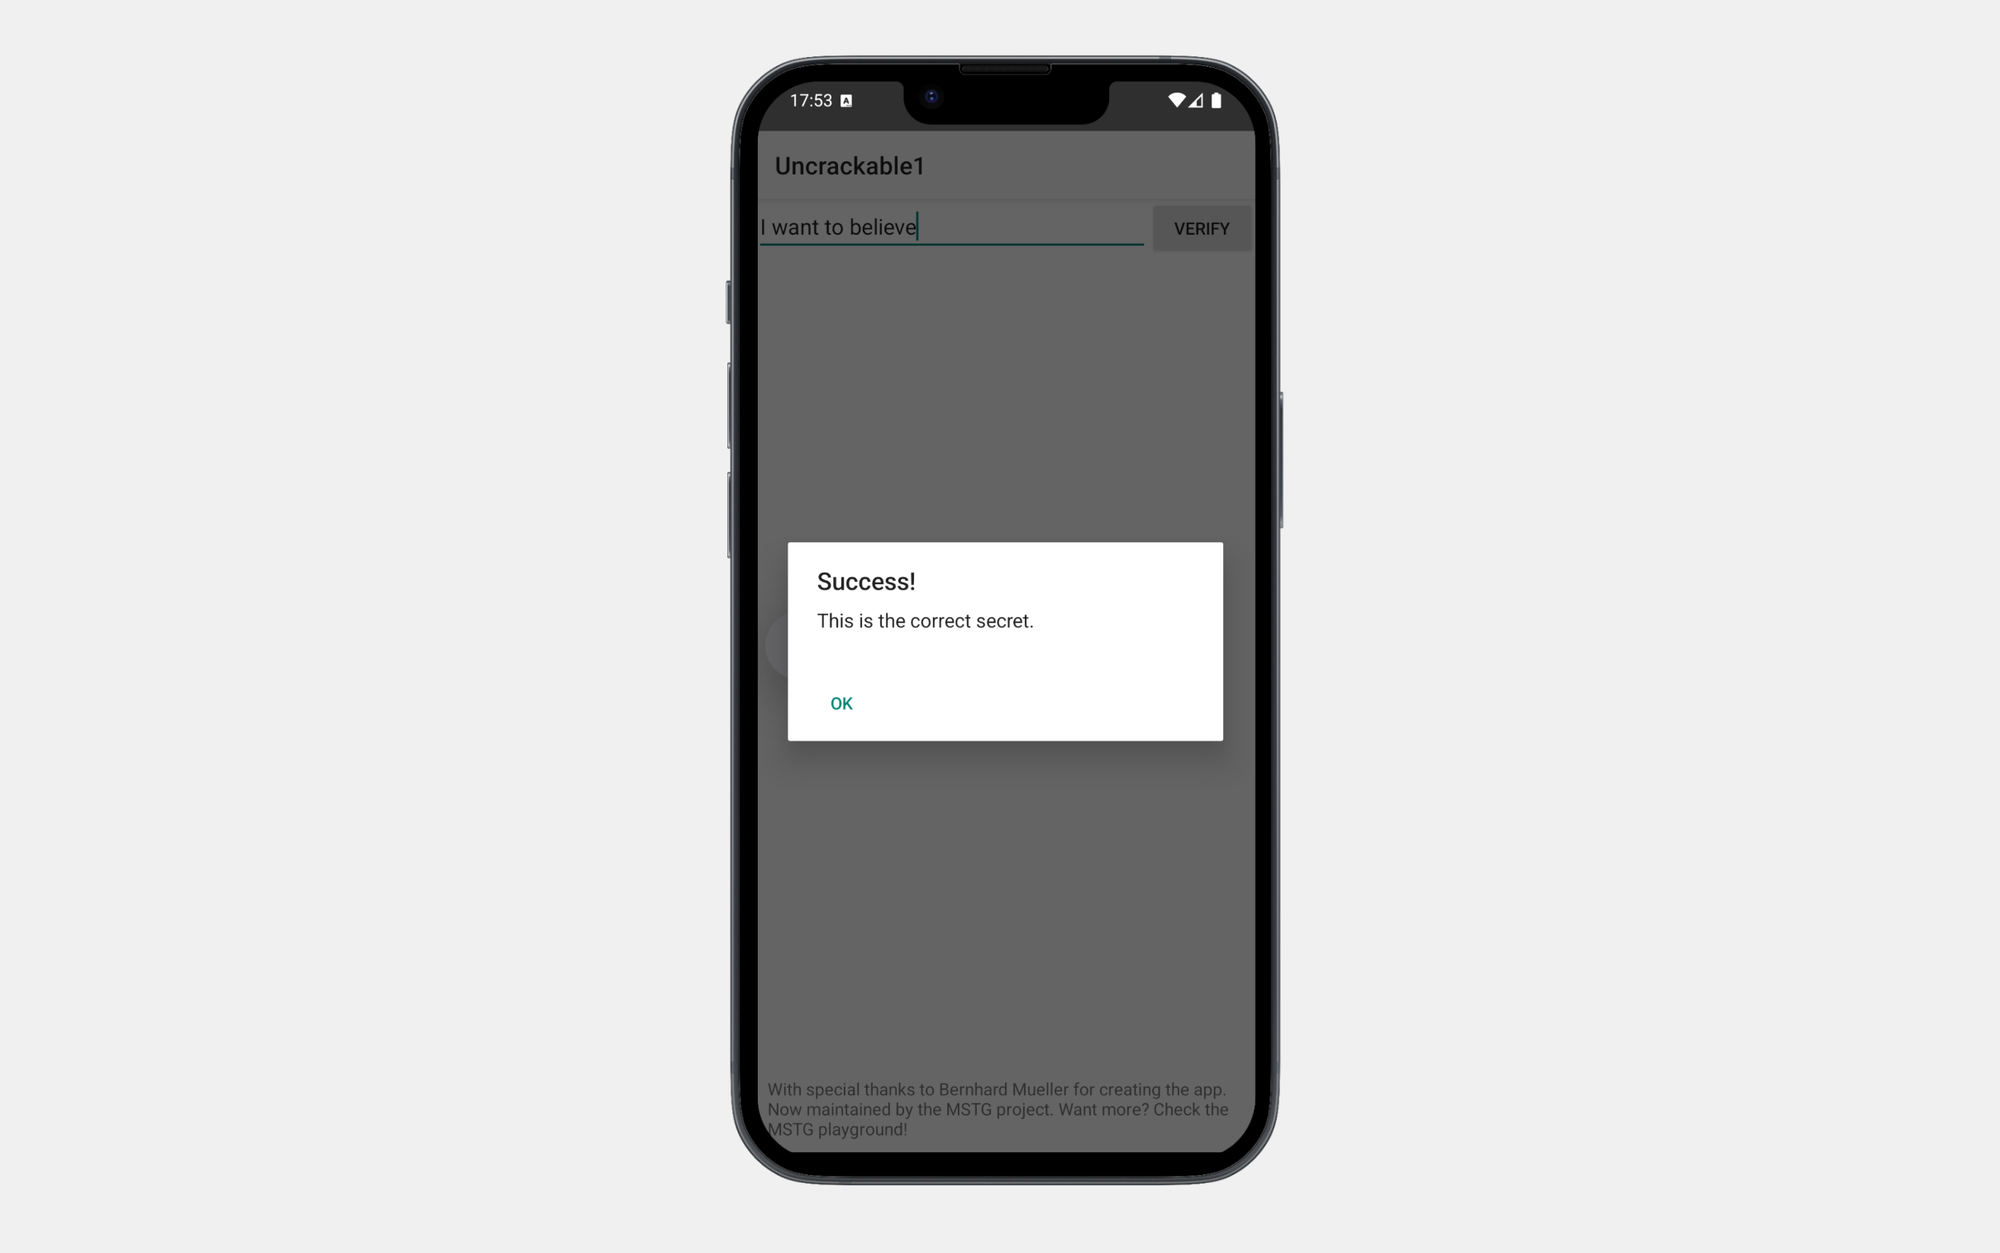
After running the code, you'll reveal the secret:
"I want to believe."
Key Takeaways
- Obfuscation makes reverse engineering harder but is not foolproof.
- Avoid hardcoding secrets (keys, credentials) in your app.
- Use secure encryption algorithms (AES-CBC/GCM) and proper key management.
- Regularly test your apps against OWASP MASVS and follow best practices for mobile security.
Thanks for reading this far! ✨ This is only the first step toward understanding Mobile App Hacking for Android. I hope this guide sparks curiosity and new ideas!


